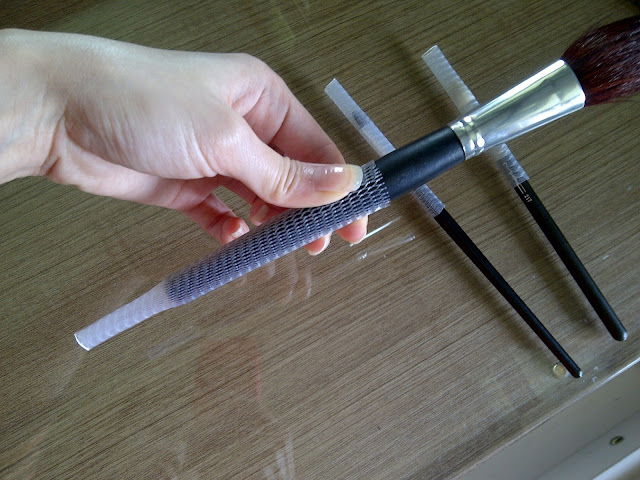
By the way i understand that in my country, Indonesia, there's still just a few people know what Brush Guard is.. So I'm gonna explain it very short & quick. I red that Brush Guard is very popular nowadays in US, coz it could prolong the life of our brushes and also keep brushes in a good shape.. To keep it simple, we all know that make up brushes are not cheap, and when we spent money on them, we want them to last very long time.. So i decided to bought this tools soon as i see a great deal..
So here's how mine looks.....
Its wrap in a plastic case...
Contains: 5 LONG & 5 SHORT Brush Guard
To tell you the truth, i always kinda lazy to clean my make up brushes... yeah, guilty as charge... I know it contain dirt and bacteria.. and YES, i also know it will be bad for my skin to use a dirty brush... But i really2 hate cleaning my brushes *crying*....
Why? Not because I'm really2 lazy like "Shit i don't want to waste my time cleaning brushes" ..... NO... But make up brushes kinda expensive.. and i hate how washing it make the bristles fly away and make my brushes not in shape anymore T_T If i don't wash it, I am keeping the shape.. but If i don't wash it, I'm ALSO gonna keeping the germs and dirts.. BIG dilemma...
So, yesterday i put this Guard to the test for the first time.. I cleaned my MAC Brush 217 and also my 2 drugstore brushes (blush brush and shadow brush)....
This is how my brushes looks after cleansing... they were still wet...
You could see that my MAC 217's bristles kinda flying away everywhere..
The Blush brush also have a few hair out of place...
Start from the 217.. Since this is just a blending brush, I put on the SHORT guard.. i start to put it on from the bottom handle, and push it to the bristles...
ZOOM on the 217's bristles... look they were not in a good shape after i cleaned it
Done! Now this Brush Guard gonna hold the bristles..
I also did the same with my drugstore shadow brush....
For the big blush brush.. i used the LONG Brush Guard.. also the same, We have to ALWAYS push it from the handle to the bristles..
DONE... Now lets air dry it..
(IMPORTANT: Don't ever hairdryer your brushes, just let it air dry naturally..)
(ALSO IMPORTANT: Brushes have to FACING DOWN when we air dry it, so the water and moisture wont running in to the roots and weaken the glue.. it will shorten the life of our brushes)
This is how i air dry my brushes... I used Drying Rack and an elastic band (yeah.. yeah.. hahahaha....)
Let it in this upside down position until completely dry... Small brushes only needs 1 day to dry.. But larger brush like very dense kabuki brush or blush brush usually take me about 2 days.. If you want to speed it up, put it in a room with air conditioner ^^
So here THE FINAL DRY RESULTS:
(sorry the photo kinda dark.. i took it at night with bad lighting..
I am never been happier ^^ My brushes looks like new.. no fly aways.. no bad shape.. woohoooo... *dancing*......
PROS:
- Great for after cleansing brushes.. to put the brushes back to the real shape..
CONS:
- people said it good for travelling also to keep the brushes shape.. but i honestly hate using brush guard for travelling.. because after a long journey in my brush case and after a few shaking.. the hairs got stuck in the holes and damaged the bristles.. SO i DON'T recommend travelling with it..
OVERALL:
- I like using brush guard, and definitely happy to use it every time after i wash my brushes to make it looks like new again.


No comments:
Post a Comment